A Friendly Welcome to the World of Dabbing
Does the world of dabbing feel like you need a chemistry degree just to get started? Don't sweat it. Think of this guide as your chill lab partner, here to clear the smoke and make sense of it all.
And no, a "dab rig" isn't the latest viral dance move, though your first time using one might feel just as slick. It's a special kind of water pipe made specifically for vaporizing cannabis concentrates. It's basically the espresso machine of the cannabis world—it delivers a much more potent, flavorful, and concentrated experience than your average coffee pot. It really puts the high in high-tech.
What Makes a Dab Rig Different?
So, why would you pick up a dab rig instead of sticking with what you know? It really boils down to two things: efficiency and flavor. Dabbing is a much cleaner experience because you’re vaporizing your concentrate, not burning it. That means you get all the good stuff without the ash and burnt plant material.
Here’s why so many people are making the switch:
-
Potency and Efficiency: A tiny amount of concentrate goes a very long way. Because they're so powerful, you use way less material to get the effects you're looking for. It's truly a less-is-more situation.
-
Unbeatable Flavor: When you take combustion out of the picture, the amazing flavors of your concentrates—which come from compounds called terpenes—really get to shine. It's the difference between tasting smoke and tasting the true essence of the plant.
-
A Cleaner Hit: The water filtration cools the vapor down, making it much smoother on your lungs compared to traditional smoking. Your throat will thank you.
Think of a dab rig as a precision tool. It’s built to heat concentrates to the perfect temperature to unlock their full potential without scorching them. That pinpoint accuracy is what saves the flavor and delivers a uniquely clean hit. It's less "scorched earth" and more "gourmet chef."
- Abongham Blinkin
To get you started, we've put together a quick rundown of the best types of rigs for beginners. This table should help you narrow down your choices right away.
Quick Guide to the Best Dab Rig Types for Beginners
To find the best dab rig for you, start here. This table summarizes the top choices for beginners, highlighting their key features to help you make a fast, informed decision.
| Rig Type | Best For | Ease of Use | Typical Price |
|---|---|---|---|
| Mini Glass Rig | Pure flavor & a traditional feel | Moderate | $40 - $100 |
| Silicone Rig | Durability, travel & the chronically clumsy | Easy | $30 - $70 |
| E-Rig | Ultimate convenience & precise temps | Easiest | $150 - $400 |
| Nectar Collector | Portability & micro-dosing | Easy | $20 - $60 |
Ultimately, the right rig is the one that fits your lifestyle and comfort level. Whether you prioritize flavor, durability, or just want something that works with the push of a button, there's a perfect starting point for you.
The market for these devices is blowing up. The global spread of cannabis accessories has made beginner rigs way more accessible and affordable. For newcomers, this means you've got tons of entry-level options, from mini rigs to e-rigs with temperature control, all at great prices—a trend that really took off after 2023. If you want to dive deeper, you can find a ton of insights on these market trends and even explore detailed analysis on how dab tools have been developing to stay in the loop.
This guide will walk you through everything, step-by-step. By the end, you'll go from being a curious newcomer to someone who can confidently pick out one of the best dab rigs for beginners. Let's get into it.
Understanding the Anatomy of a Dab Rig
At first glance, a dab rig can look like a prop from a science class you definitely slept through. But fear not—every curve, tube, and connection has a simple job to do. Once you get the lingo down, it’s less “mad scientist” and more “master of flavor.”
Think of a dab rig as a small, specialized team where each member is essential. From the mouthpiece where you connect to the banger where the action happens, they all work together to turn a sticky concentrate into smooth, potent vapor.
Let's break down this all-star lineup.
The Mouthpiece and Main Chamber
The mouthpiece is exactly what it sounds like—it’s where your mouth goes to inhale the vapor. It’s the final stop on the vapor’s journey, and the only real rule here is to find one that feels comfortable.
Connected to it is the main chamber, the rig’s central hub and water reservoir. This is where the magic of water filtration happens, cooling the vapor down before it ever reaches you. Think of it as the rig’s lungs, taking a deep breath of vapor and giving it a quick, refreshing dip in the pool.
The Joint: The Universal Connector
The joint is the connection point where your banger (the heating element) slides into the rig. This is the universal adapter of the dabbing world, and getting the gender and size right is crucial. It’s a bit like plugging a charger into the wall—the wrong plug just won’t work.
Joints come in two "genders":
-
Male Joints: These are tapered and slide into a female accessory.
-
Female Joints: These have a wider opening that a male accessory slides into.
Most modern rigs feature a female joint, which means you’ll typically be shopping for a male banger. It’s a classic case of opposites attract.
Just remember this simple rule: the banger's gender should be the opposite of your rig's joint. This ensures a snug, secure fit, preventing any tragic vapor escapes or wobbly accessories. You wouldn't want to lose your vapor in a joint custody battle.
Beyond gender, size matters. The most common joint sizes you'll run into are 10mm, 14mm, and 18mm. A 14mm joint is the most popular size by a long shot and is a fantastic starting point for anyone looking for the best dab rigs for beginners. It offers a great balance of airflow without feeling too airy.
For a complete breakdown of all the moving parts, our guide on what exactly a dab rig is covers everything you need to know.
The Banger: The Hot Seat
Finally, we arrive at the banger, also known as a nail. This is the bucket-like piece you heat with a torch. It's the "hot seat" where your concentrate is placed to be vaporized—think of it as a tiny, super-heated frying pan for your dabs.
Bangers are most commonly made from quartz because it heats up fast, can handle extreme temperatures without cracking, and delivers an exceptionally clean flavor. When you heat the banger and drop in your concentrate, it instantly flashes into vapor, which is then pulled through the joint and into the main chamber for cooling.
And that’s really it! You now know the four core components of any dab rig. Understanding how the mouthpiece, chamber, joint, and banger work together demystifies the whole setup. You're no longer just looking at a weird glass sculpture; you're looking at a precision tool for flavor.
Choosing Your Material: Glass vs. Silicone Rigs
Picking the material for your first dab rig is a huge decision. It's kind of like choosing between a classic glass wine goblet and a super-durable insulated tumbler for coffee—they both do the job, but the vibe and experience are totally different. This is the great debate for newcomers: do you go for the pure, clean taste of glass, or the nearly indestructible, take-it-anywhere convenience of silicone?
The material you choose has a direct impact on flavor, durability, how much of a pain it is to clean, and of course, the price tag. Each one has its own personality. Honestly, the best dab rigs for beginners are usually the ones that fit their owner's lifestyle—and general level of clumsiness.
Let's break down this classic showdown so you can pick your side.
The Case for Glass: The Flavor Purist
If you're someone who cares about taste more than anything else, glass is the undisputed champion. It’s not even a fair fight.
Most quality rigs are made from borosilicate glass, which is a special type of glass built to handle crazy temperature swings without cracking. You know how you can take a Pyrex dish from a hot oven and it doesn't just explode? That's the magic of "boro" at work.
This material is totally non-porous and chemically inert. In plain English, that means it won’t hang onto old, stale flavors or add any weird, plasticky taste to your vapor. What you get is the purest possible expression of your concentrate's terpenes—the compounds that give it all that amazing flavor and aroma. Dabbing with a glass rig means you taste the concentrate, and only the concentrate.
In the dabbing world, think of glass as a high-fidelity sound system. It delivers a crisp, clean, and totally unaltered experience, letting you appreciate every subtle flavor note your concentrates have to offer. It’s got real class, that glass.
- Abongham Blinkin
But, this pristine experience comes with a big catch: it's fragile. Glass rigs are the divas of dabbing; they demand to be handled with care and can shatter from a single accidental drop. If you're a bit of a butterfingers, this could be a deal-breaker. If you want to dive deeper into what makes this material so special, our guide on what is borosilicate glass breaks it all down.
The Case for Silicone: The Indestructible Adventurer
Does the thought of your expensive new glass piece shattering into a million pieces give you anxiety? If so, let me introduce you to your new best friend: silicone.
A high-quality, food-grade silicone rig is a clumsy dabber’s dream come true. These things are flexible, they bounce, and they're pretty much indestructible. You can toss one in a backpack for a camping trip, take it to a festival, or accidentally knock it off the coffee table without breaking a sweat. It’s the action hero of dab rigs.
Silicone is also ridiculously easy to clean. Most of the time, you can just squish it around in some warm, soapy water. For really stubborn residue, you can even throw it in the freezer for a bit, and the gunk will pop right off. This forgiving nature makes silicone a top pick for beginners still getting comfortable handling their gear.
The trade-off? Flavor. While it’s super convenient, silicone can sometimes add a subtle taste, especially when it’s brand new. It's also porous on a microscopic level, so it can hold onto old flavors if you don't clean it regularly. For many beginners, though, the peace of mind that comes with a nearly unbreakable rig is well worth the slight compromise on taste.
Glass vs. Silicone: A Head-to-Head Comparison
To make the choice a little clearer, let's put them side-by-side. Think about what's most important to you as you get started.
| Feature | Glass Rigs | Silicone Rigs |
|---|---|---|
| Flavor Purity | Excellent; delivers pure, unaltered taste. | Good; can sometimes impart a slight taste. |
| Durability | Fragile; can break easily if dropped. | Excellent; nearly indestructible and travel-friendly. |
| Maintenance | Requires specific cleaning solutions (like isopropyl alcohol) to remove residue effectively. | Very easy to clean; flexible and often dishwasher-safe. |
| Heat Resistance | High; borosilicate glass handles extreme heat without issue. | High; food-grade silicone is heat-resistant but shouldn't contact a direct flame. |
| Price Point | Wider range, from affordable to very expensive art pieces. | Generally more affordable and budget-friendly. |
At the end of the day, there’s no single right answer. If you're mostly dabbing at home, value top-tier flavor, and don't mind being a little careful, a glass rig is a fantastic choice. But if you’re always on the move, have pets or kids running around, or are just plain accident-prone, a silicone rig will save you a ton of stress and money.
A Guide to Percolators for a Smoother Hit
Ever look inside a dab rig and see that wild, intricate glass sculpture sitting in the water? That's a percolator, and it does a lot more than just look cool.
Think of it as your rig’s built-in cooling and filtering system. It’s the secret sauce that turns a potentially harsh, hot hit into a silky-smooth cloud. A percolator, or "perc," forces vapor through the water, breaking it into tons of tiny bubbles.
This bubbling action dramatically increases the vapor's surface area, giving it more contact with the water. The result? A one-two punch of cooling and filtering that makes every inhale way less aggressive on your throat and lungs. It’s the difference between jumping into a hot tub and easing into a perfectly warm bath.
This is exactly what makes the best dab rigs for beginners so forgiving—it provides a buffer that makes your introduction to concentrates much more pleasant. There is a small trade-off, though. The more complex the perc, the more drag (resistance) you might feel when you pull. Finding the right balance is key.
Common Percolator Types for Beginners
You don’t need a degree in fluid dynamics to get a handle on percs. For a beginner, a few simple, effective designs get the job done without turning your cleaning routine into a nightmare.
Here are a few popular types you’ll see in beginner-friendly rigs:
-
Diffused Downstem: This is the OG of percolation. Just a simple tube with slits at the bottom that sits in the water. It’s effective, straightforward, and a breeze to clean—a perfect starting point.
-
Showerhead Perc: Shaped just like its name suggests, this perc pushes vapor down and out through a bunch of slits or holes. It offers a fantastic balance of solid filtration and low drag for a smooth hit every time. It really makes it rain... smooth vapor.
-
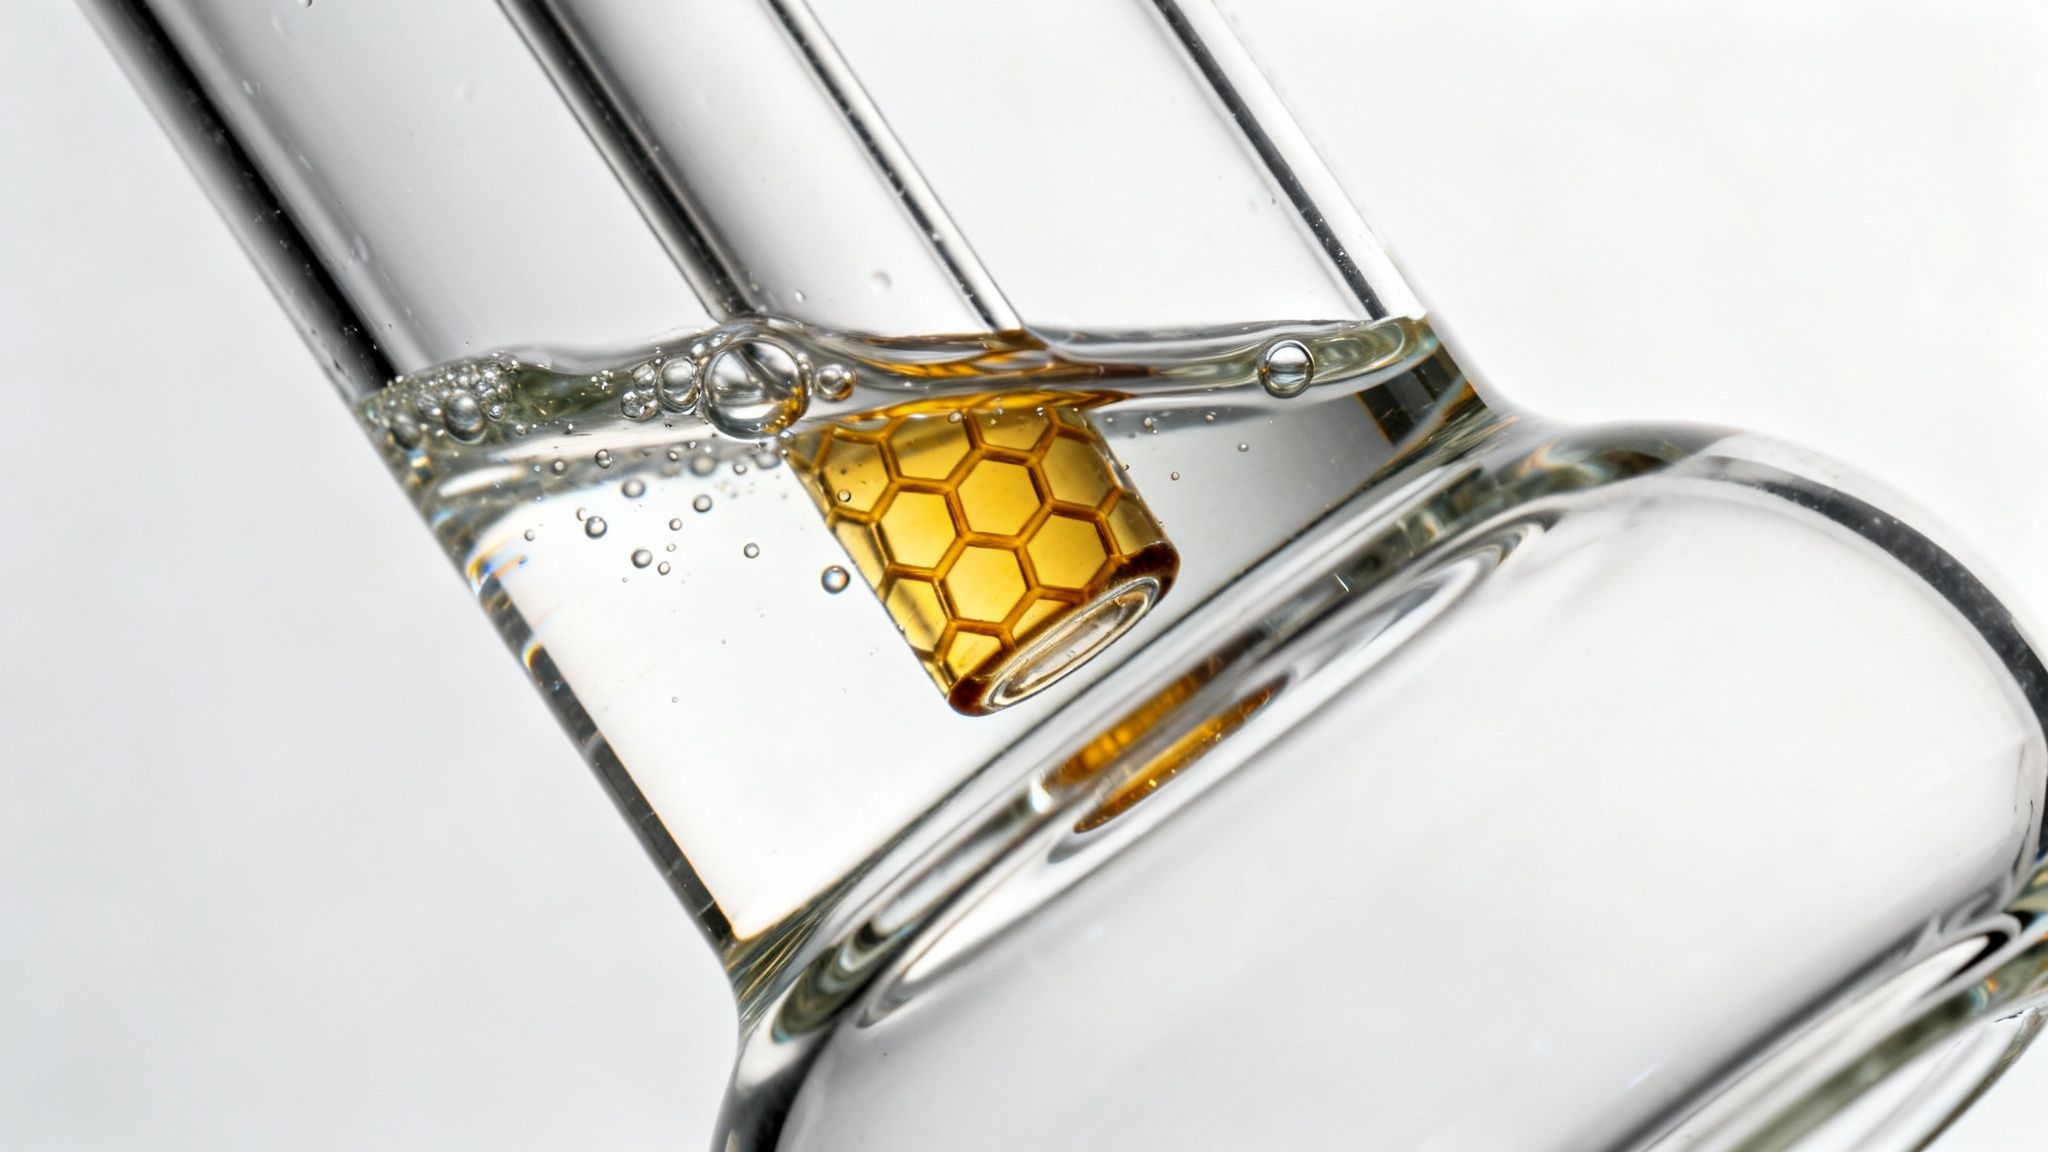
Honeycomb Perc: This design uses a flat disc full of tiny holes, like a honeycomb. It creates an awesome stack of small bubbles, giving you great filtration with very little drag. Plus, they just look cool in action. It’s the bee's knees of percs.
The goal of any percolator is simple: make more bubbles. More bubbles mean more surface area, which leads to better cooling and filtration. That's it. Your lungs will thank you for choosing a rig that gives your vapor a good bubble bath.
- Abongham Blinkin
Balancing Filtration with Maintenance
When you're new, it's tempting to grab the rig with the craziest, most scientific-looking percolator you can find. A triple-stacked UFO-to-tree-perc combo might look epic, but trust me, it can be a real headache to clean.
For your first rig, simplicity is your best friend. A single, well-designed perc like a showerhead or honeycomb provides all the filtration you need for a comfortable session.
Think of it this way: more complex percs have more nooks and crannies for gunk to build up in. While that’s not a dealbreaker, it means more frequent cleaning. Some people use accessories to keep their main piece cleaner, and you can learn how to use an ash catcher to help keep the chamber pristine.
Ultimately, picking a percolator is all about finding that sweet spot between a super-smooth hit and a cleaning routine that doesn't feel like a chore.
The Rise of E-Rigs for Beginners
Ready to skip the blowtorch and feel a little less like a mad scientist in your own living room? Welcome to the evolution of dabbing. Electronic rigs, or e-rigs, are a complete game-changer, especially for anyone searching for the best dab rigs for beginners. They take the most intimidating part of the process—a fiery torch—and replace it with simple, push-button precision.
If a traditional rig is like a stick shift car that takes some finesse to drive smoothly, an e-rig is a luxury automatic. There's no guesswork, no timing the cooldown, and no risk of accidentally singeing your eyebrows or your coffee table. It's the "set it and forget it" approach to dabbing, and it’s a huge reason they’ve become so popular.
The learning curve with a torch can be steep, but e-rigs completely flatten it. This makes the entire experience more approachable, consistent, and frankly, a lot less stressful for newcomers.
Why E-Rigs Are a Beginner’s Best Friend
The main draw of an e-rig is just how easy it is to use. Instead of playing a guessing game with a torch to find that perfect temperature, an e-rig lets you dial in the exact heat setting you want. This precision isn't just for show; it brings real benefits that make a huge difference in your session.
-
Pinpoint Temperature Control: This is the star of the show. You can set a low temp to savor every bit of flavor from your concentrate or turn it up for thicker, more potent vapor—all with the press of a button.
-
Unmatched Consistency: Every single session can be identical. Once you find a temperature you love, you can replicate that perfect hit time and time again, which is nearly impossible to do with a torch when you're just starting out.
-
Superior Safety: Taking a high-powered open flame out of the equation is a massive safety upgrade. There’s no risk of burns, no need to store butane, and far less to worry about in general.
For a beginner, the precision of an e-rig is like having training wheels. It removes the two biggest points of failure—overheating or underheating the banger—guaranteeing a better, more efficient, and tastier experience right from the start.
- Abongham Blinkin
In the last few years, the market has seen a massive shift toward these devices. Since around 2020, the industry has leaned heavily into e-rigs that offer controlled temperatures, faster heat-up times, and enclosed heating units. This directly cuts down the risks and challenges for new users, with many mid-range models now offering temperature control between 200–650°F and powerful batteries that last for multiple sessions on a single charge. You can discover more insights about these vaporizer market trends to see how technology is making dabbing more accessible.
The Trade-Offs: What to Consider Before Buying
Of course, no device is perfect. While e-rigs offer a ton of advantages, there are a couple of trade-offs to keep in mind before you decide to go electric.
The biggest factor is the cost. E-rigs have a much higher upfront price than a simple glass or silicone setup. You're paying for the convenience, technology, and safety features, which can put them out of reach if you're on a tight budget.
Plus, e-rigs are battery-powered, which means you have to remember to charge them. A dead e-rig is a session stopper, whereas a traditional rig and torch are always ready to go as long as you have butane. Some advanced models, like the popular Puffco Peak Pro smart e-rig, offer modern conveniences like USB-C charging to make this less of an issue.
Ultimately, choosing an e-rig comes down to weighing convenience against cost. For many beginners, the safety and consistency are well worth the investment, making it a top contender for the best dab rig to start with.
A Step-by-Step Guide to Your First Dab
Alright, it's go-time. You’ve picked out your rig, you're feeling brave, and you're ready for takeoff. Think of this section as your co-pilot, giving you a pre-flight checklist for a smooth first journey into the world of concentrates.
The whole process might look a little intimidating, but it’s really just a few simple steps. Whether you’re wrangling a fiery torch or just pushing a button on a sleek e-rig, the goal is always the same—heat it up, drop it in, and enjoy. Let’s walk through both methods so you feel confident no matter which route you take.
Prepping Your Rig for Launch
First things first, let's get your rig ready for action. Pour just enough water into the main chamber to cover the bottom slits of your downstem or percolator. If you don't use enough water, you won't get any cooling. Use too much, and you'll be sipping on some very unpleasant "rig water." It’s like filling a bathtub—enough to do the job, but not so much you flood the bathroom.
Next, grab your concentrate. For your first time, you only need a tiny amount—seriously, about the size of a grain of rice is perfect. Concentrates are incredibly potent, and you can always go back for another round if you want. Use a dab tool to scoop up your little dab and set it aside, ready to go. A solid tool like a human-grade stainless steel dab tool makes handling sticky concentrates way cleaner and easier.
E-Rig vs Torch Heating Methods
This flowchart breaks down the basic difference between the old-school torch method and the modern e-rig approach.
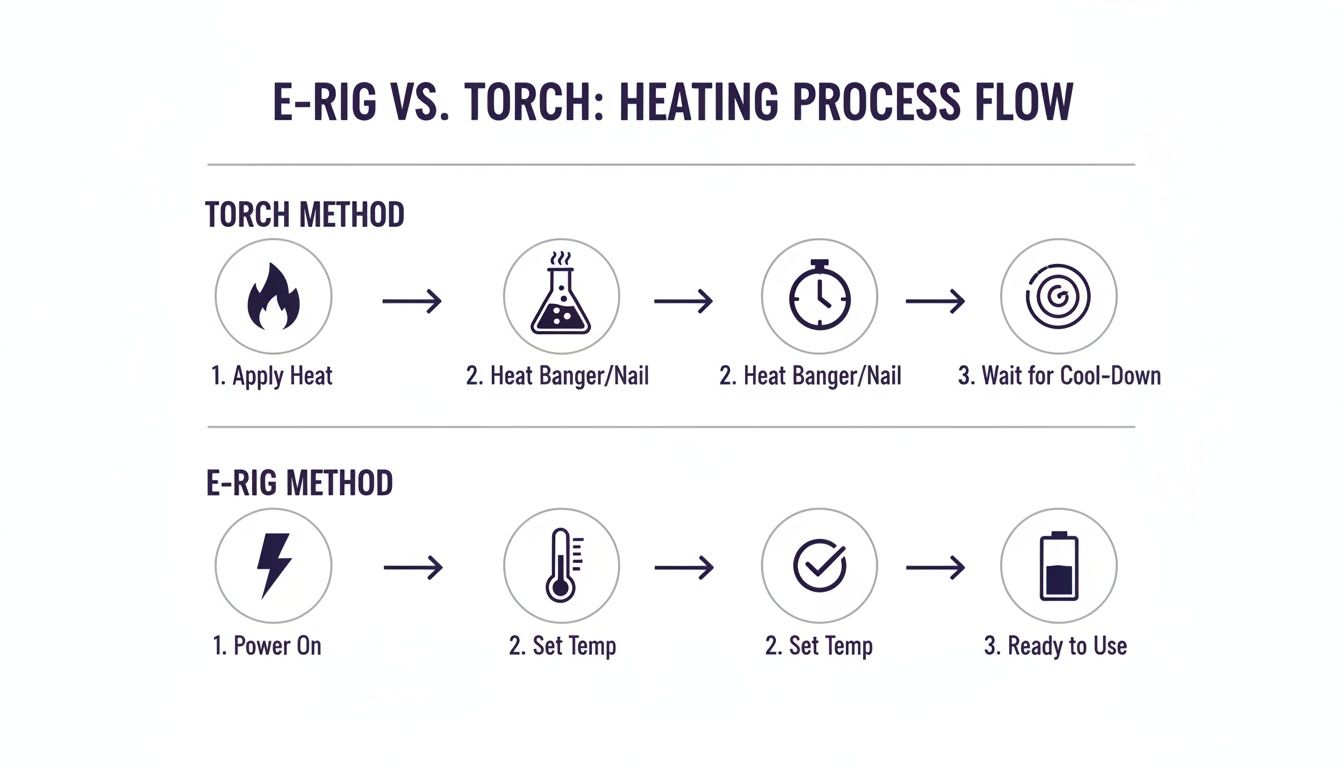
As you can see, the e-rig pretty much automates the trickiest parts—the heating and timing—which is a huge plus for beginners.
The Traditional Torch Method
This is the classic way to do it. It takes a little practice but gives you a really satisfying, hands-on experience.
-
Heat the Banger: Fire up your butane torch and aim the flame right at the bottom of the banger. You'll want to heat it until it starts to glow red, which usually takes about 20-30 seconds. Just be sure to point the torch away from yourself and the glass body of your rig.
-
Wait for the Cooldown: This is the most important step! Never, ever apply your concentrate to a red-hot banger unless you enjoy the taste of burnt sadness. You need to let it cool down for 30-60 seconds to reach the sweet spot, which is typically between 350-450°F. This is what's known as a "low-temp dab," and it’s how you preserve all those amazing flavors.
-
Apply and Inhale: Using your dab tool, gently touch the concentrate to the inside wall of the banger while you start inhaling slowly and steadily. Give the tool a little twirl to make sure all the concentrate melts off and vaporizes.
-
Cap It: As you inhale, place the carb cap on top of the banger. This traps the heat and helps vaporize the concentrate way more efficiently, so you don't waste a drop.
The Simple E-Rig Method
If you went with an e-rig, your life is about to get a whole lot simpler.
-
Turn It On: Power up your device and pick your temperature.
-
Wait for the Signal: The e-rig will heat up on its own. Most will vibrate or flash a light to let you know when it’s hit the target temp and is ready to go.
-
Apply and Inhale: Just like with the torch method, drop your concentrate into the heating chamber and start inhaling. Pop the carb cap on top, and you're all set.
No matter which method you use, remember to start small, stay seated for your first session, and always treat a hot banger or torch with extreme caution. Welcome to the club.
Frequently Asked Questions About Dab Rigs
Got a few more questions rattling around? Totally normal. Here are the answers to some of the most common things beginners ask before diving in.
What Is the Ideal Temperature for a First Dab?
For your first time, you absolutely want to go for a "low-temp" dab. Keep it between 350-450°F. This is the magic window where you vaporize all the good stuff without scorching the flavorful terpenes, giving you a smooth, tasty hit instead of a harsh, cough-inducing one.
Think of it like searing a steak. Too hot, and you just char the outside. A dab that's too hot torches your concentrate, tastes awful, and is super rough on your lungs. Gentle heat is the way to go.
How Much Water Should I Put in My Dab Rig?
This is way simpler than it looks. You only need enough water to cover the holes or slits on your percolator (or downstem). That's it.
Too little water means you get zero filtration and cooling. Too much, and you'll get a nasty splash of bong water in your mouth when you inhale. The easiest way to check is to fill it, then give a gentle test pull before heating anything. If it bubbles nicely without splashing up the mouthpiece, you've nailed it.
Your rig’s water level isn't about filling it up; it’s about creating the perfect bubble machine. The goal is to submerge the diffusion points (the little holes) just enough to create a smooth, chugging action when you inhale, giving your vapor a proper bath.
What’s the Difference Between a Dab Rig and a Bong?
They might look like they're from the same family, but dab rigs and bongs have completely different jobs. Bongs are for combusting (burning) dry herb. They're usually bigger to handle the large volume of harsh smoke and give it more time to cool down.
Dab rigs are specifically for vaporizing concentrates. They're much smaller because vapor is less harsh and doesn't need as much cooling. More importantly, that smaller chamber keeps the flavor of your concentrate from getting diluted. The main giveaway is the heating element: a bong uses a bowl, while a rig uses a nail or banger.
Are E-Rigs Better for Beginners?
Honestly, for a lot of newcomers, e-rigs are a much smoother and safer entry point into dabbing. They take the two trickiest parts out of the equation: the blowtorch and the temperature guesswork.
With an e-rig, you just press a button to get the exact temperature you want, every single time. It’s why they’re often called the best dab rigs for beginners. While the initial cost is higher, the safety, consistency, and ease of use they offer make the whole learning curve feel a lot less intimidating.
Ready to find the perfect gear without the guesswork? Autobongs is a guided online smoke shop that simplifies buying accessories with total clarity. From starter rigs to all the essential tools, we provide straightforward explanations to help you shop with confidence. Explore our curated selections at https://www.autobongs.com.